Last week I couldn't get the header bolted on the engine because the sub-frame was in the way, well after re-reading the instructions I "discovered" the header needs to be bolted in place before installing the engine. I bolted the header on, and slipped the sub-frame on the engine and BAM it fit.
Now that I'm done with that fit verification, I took the sub-frame back off and bolted it up under the car. There are 4 extra holes that needed to be located and back drilled to the car. I was able to install the subby, then mark and drill the holes, that was a nice easy straight forward task.
That was the last of the messing around with the sub-frame so I put it in the sun and gave it a fresh coat of paint to eliminate all the scratches I put in it. I was able to clean and paint some other little pieces, and started to take the suspension arms, and hubs apart to paint as well.
Next I was able to clean up the two
hydrolastic displacers (sounds like something that belongs on the
Millennium Falcon) and install them. I had such a hard time getting them out and now that they are all clean I know why. There are 4 little tabs that engage the mating collar inside the sub-frame tower. You simply push the displacer up and give it a hard twist till they lock.
As of now, I can't install any more parts as far as the sub-frame goes because I need two $1.50 little nylon caps that have worn out. They go into the upper suspension arms that need to be installed before the engine goes in the sub-frame. I hope to have these in the next few days but that gives me time to paint the upper arms with POR-15 anyway.
![](https://blogger.googleusercontent.com/img/b/R29vZ2xl/AVvXsEhclO2SJqwDoDaGFaFNwZDJRcdbYHjzupL0t9DxTFzTZQUnkYLE6D_xs0rOFhtKP1sgET-uybWP1Rxk-q5uNZIZf1h9-d5lOcy6eoza7Ie7WNKVmK7TKI6Cy6NYLTfsWFsPyvR7NVHcpodM/s640/DSCN3896.JPG) |
Header and engine fit like a glove in the sub-frame. |
![](https://blogger.googleusercontent.com/img/b/R29vZ2xl/AVvXsEjggtY4jsp0-BWGRPXtBLm0I8psdkcYnZl9aYm28A-5aMNdu27nH-hMoXlPE-8xWf6Ls2yldvKfPkNx906y0t9nvrcdnS_AnS4n7cbQbmMv0atJqjx2VfgR5BJ1YOsksX94w45bUTZS5iPf/s640/DSCN3897.JPG) |
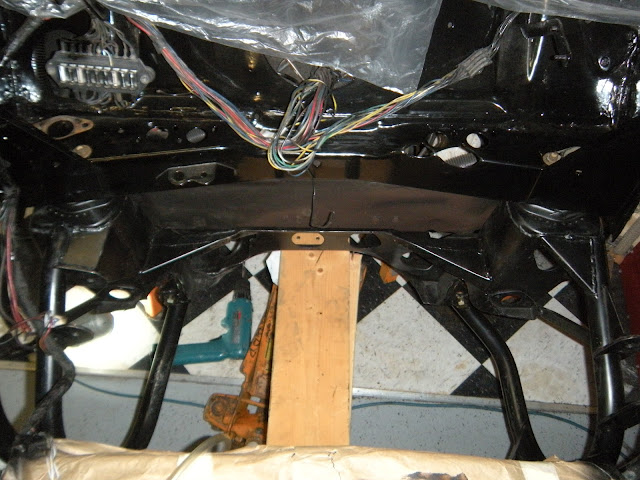
Looking down at sub-frame (supported by wood and a floor jack) is up and in the car. |
![](https://blogger.googleusercontent.com/img/b/R29vZ2xl/AVvXsEha6pCPu_5tJ50k2WgP1u-aTtUrhyphenhyphen5YyXNTidoJEV2RlgCfyBczL_Of7lMX7QRyK2PX1jOi5RBTMaTNfckOZBkJ6noE72q_75LtgQ1gLdGQ4qGWyuDEpBFnRvuH3p6ygfWL35dbXXwC4sK5/s640/DSCN3898.JPG) |
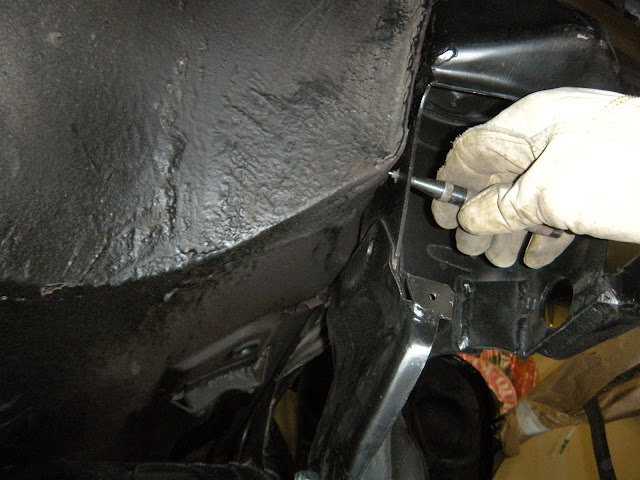
Putting in fasteners. |
![](https://blogger.googleusercontent.com/img/b/R29vZ2xl/AVvXsEiHUlt6AwYfZqiuctuOGjqlghgsFlnadSwkaHco149tf5pVIw3GlILo02pR6Nd14e3sHw59YRGNjv8VotGmubXBmUMy2k3I4xaoFDfId4MgYgXgmjwSE8aGsz3BJBGSytNHd9JOAetGDt5I/s640/DSCN3903.JPG) |
There are four extra bolts used to secure the subby, here I'm back-drilling a hole for one. |
![](https://blogger.googleusercontent.com/img/b/R29vZ2xl/AVvXsEjkqwmzJYBGiXhP6On7MAnGzmjGy7CL6hWrrhR8wGz2-MTHk5aoF6QVZnJMH8rpDad1oxtYf3DrbNFUx-edTMwRhFGC7aj5aj7HCHuyyIa8U9_pp-fT0O7JhKCjmoLa6s2AfD1-kmkb5htT/s640/DSCN3904.JPG) |
Punching a mark for another hole. |
![](https://blogger.googleusercontent.com/img/b/R29vZ2xl/AVvXsEh5RKL1dfTvEf8WMzpii4Y57BA6F9px2JIFU8-TtN0ZivlGvOjLlAUl9kVEThyPW0yiYMguWHPAi22X6MrHYrExM-2DDEr8Sj4l-gdZDWK7r-70GtaIGt6BkQBA-HtGoLwhIsc5rvD4nju0/s640/DSCN3905.JPG) |
Frame is now all done being fitted, time for some new paint. |
![](https://blogger.googleusercontent.com/img/b/R29vZ2xl/AVvXsEgzW0Oe5PnWFEXyNg3V0PJ4SL81QXa1XxEyIhYydhopzIAsoiYqQFF4REgiHJQsznwW26l1389_ETl5BO4OQr7z_cnhN8HAIzwn6M0zf-g4DfheRIJib7quehARsla0eWEaabzVwTQZ5s_I/s640/DSCN3907.JPG) |
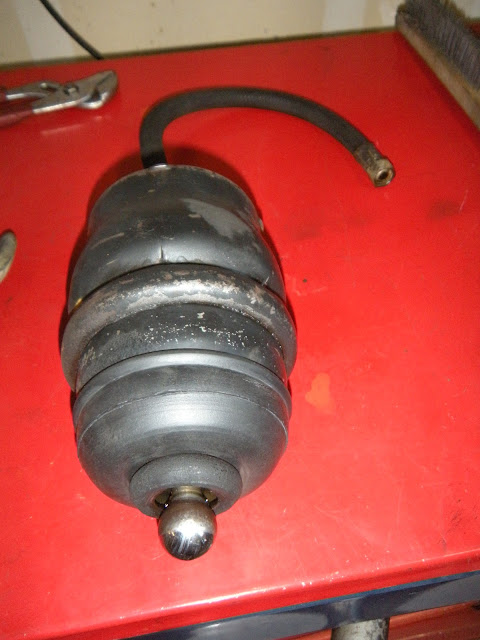
Here is a displacer all cleaned up, with a new seal and ready to go. |
![](https://blogger.googleusercontent.com/img/b/R29vZ2xl/AVvXsEg2N1-2le7wNUbFAlY0x-GFQPW7iHUbh88Deq2Hl5Ij8pQlHvSuoPeyZW0lmJy8bezOEQejcgOg9sUBKDhweBEC5QcPylHbAinipvyPtg_vUpjAdCgRZVpfsTlZmyERM-HF6hUBrTOYyxCU/s640/DSCN3910.JPG) |
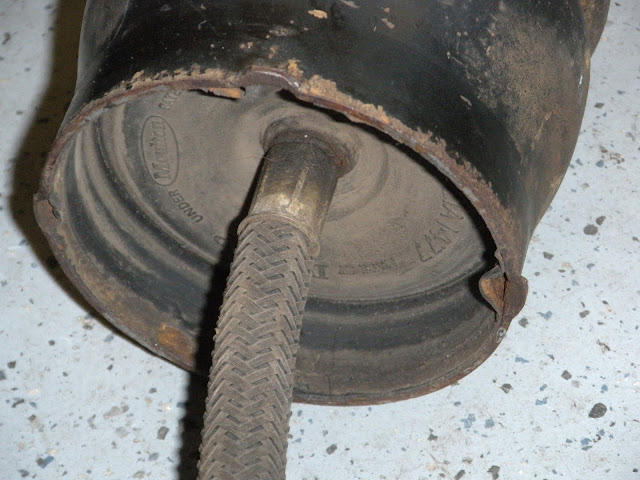
The four little tabs (three visible) are what lock the displacer in place. |
![](https://blogger.googleusercontent.com/img/b/R29vZ2xl/AVvXsEgzIaa1-DmeM4IxFJehlBzUs0l6SMcMgjnXVQoitipDz5R1rlLl7qTZUQ3531PeRh4eo31Rjce6Mgf-CpQ61U6mird6zDZwEewYXVcRLnzBzB961jSuzx99yBFmOWL-JqZLFVAyES8XNIJZ/s640/DSCN3911.JPG) |
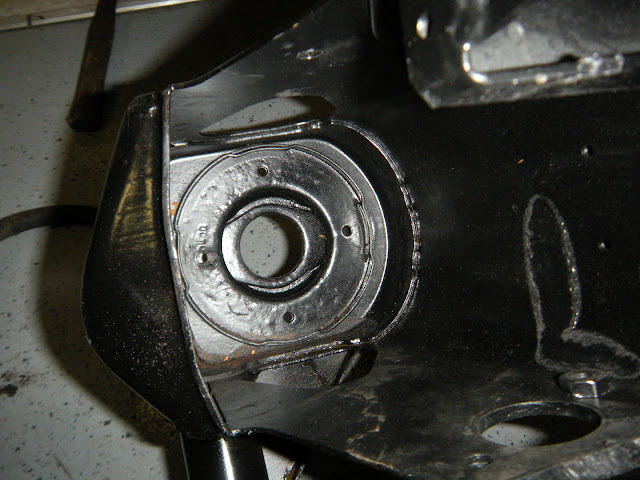
You can sorta see the four mating slots for the displacer. I wish I knew about those while trying to pull it out. |
![](https://blogger.googleusercontent.com/img/b/R29vZ2xl/AVvXsEjHePbRLXijNFN0gVt5wZFwVceUg7xKQcXjfWfWuwW0_jEN0XyHeQLzkIGaKECMum1wLSNsbfydl0hHVzRxFXc_HJQhzLnmPeb8Jysk5OqIW4w9AyOtA8Gr-OgHucZvwampCkpQUb_-vQ4K/s640/DSCN3912.JPG) |
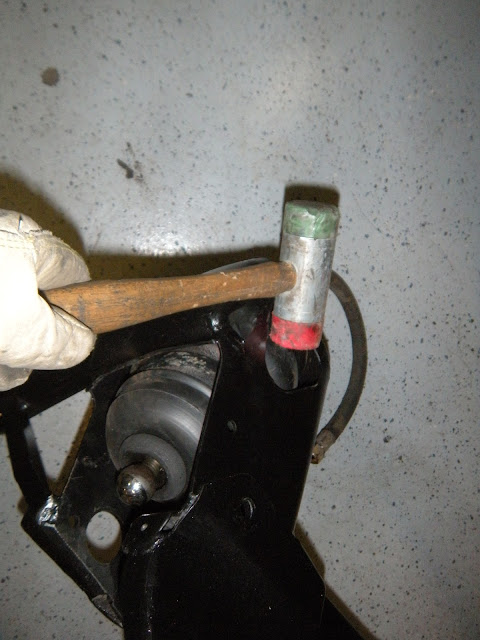
This is how you twist the displacer clockwise, hit it at an angle with a rubber mallet. |
![](https://blogger.googleusercontent.com/img/b/R29vZ2xl/AVvXsEhrSHNlRnCecrBJ3Vo0FwU0q40Z56_-_Uc6dJJblTWVpsynaJmBkG0tUFRvuADn86xvZubtdas_LnAnSfn7MxCYK_y3PQvCc3mOxyW9XswhI8XoM5DLNKpxYM1uCNq4bFnG8BnteZiy8js9/s640/DSCN3913.JPG) |
Displacer installed |
![](https://blogger.googleusercontent.com/img/b/R29vZ2xl/AVvXsEgLHYm8vEk183pwGOvwYJjDlHPJGVGYEfATsU_vbfXTOOTZhdhe9Kqki-LKfNaRcSN5Q7B0ZOUrE3ZcWc4YVZ6ZpixEnoEs913f8xfUPhNsPYT0raP7d7reBpFIKUvXcu6xJ5uFBJp9VWMF/s640/DSCN3914.JPG) |
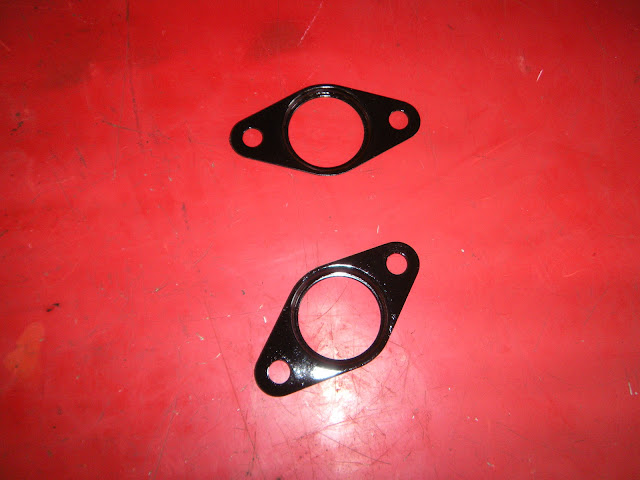
Some other parts I cleaned up and painted. |
![](https://blogger.googleusercontent.com/img/b/R29vZ2xl/AVvXsEgrehGcDR8ybJFboTQT5o5aNufw_cnqr6JjLyUQyEg70xzeTnt89djhMTWSm-nor_FrN4nPC3lqbWvfWLvwog4Lu59nV3lFq7b4Oo9bLQCUUdjPuiuMRtlVi1w2hw-rqRC1cs8yTjrRmva4/s640/DSCN3915.JPG) |
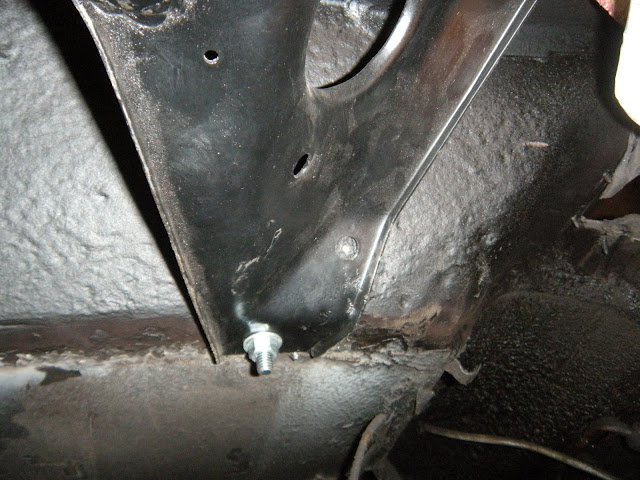
This bolt is right in the way of a track-rod, it's hollow and has a spring in it too. I need to cut, weld, and machine in some groves so I can install it and have it flush with the aluminum transmission case. |
No comments:
Post a Comment
Fell free to post any questions and I'll do my best to help you out with your project.