Pages

Monday, July 30, 2012

Chipping Away


I had some time to do some small things this weekend.  The last few weeks have been filled with family outings with little time for the car project.  Gotta take advantage of the sun when it shines in the Pacific N.W.!

Finally purchased CV joint grease.

Stuffed in the Honda side of my custom axle.

An locked down the boots.

Both sides ready to go.  All the black parts are Honda, the bare steel CVs are classic Mini S parts.

Driver side (looking from front of car).

Passenger side (looking from front of car) now that's a short shaft!

Another custom part I had to build is this tube with a double flair on one end and a bubble flair on the other (both can be made with a double flair tool).

The splitter on the left will send a line to the rear brakes.  The part on the right is a stock splitter I'm using for the two front brakes and holds the brake light switch.

Sunday, July 15, 2012

Hydraulics N Fuel


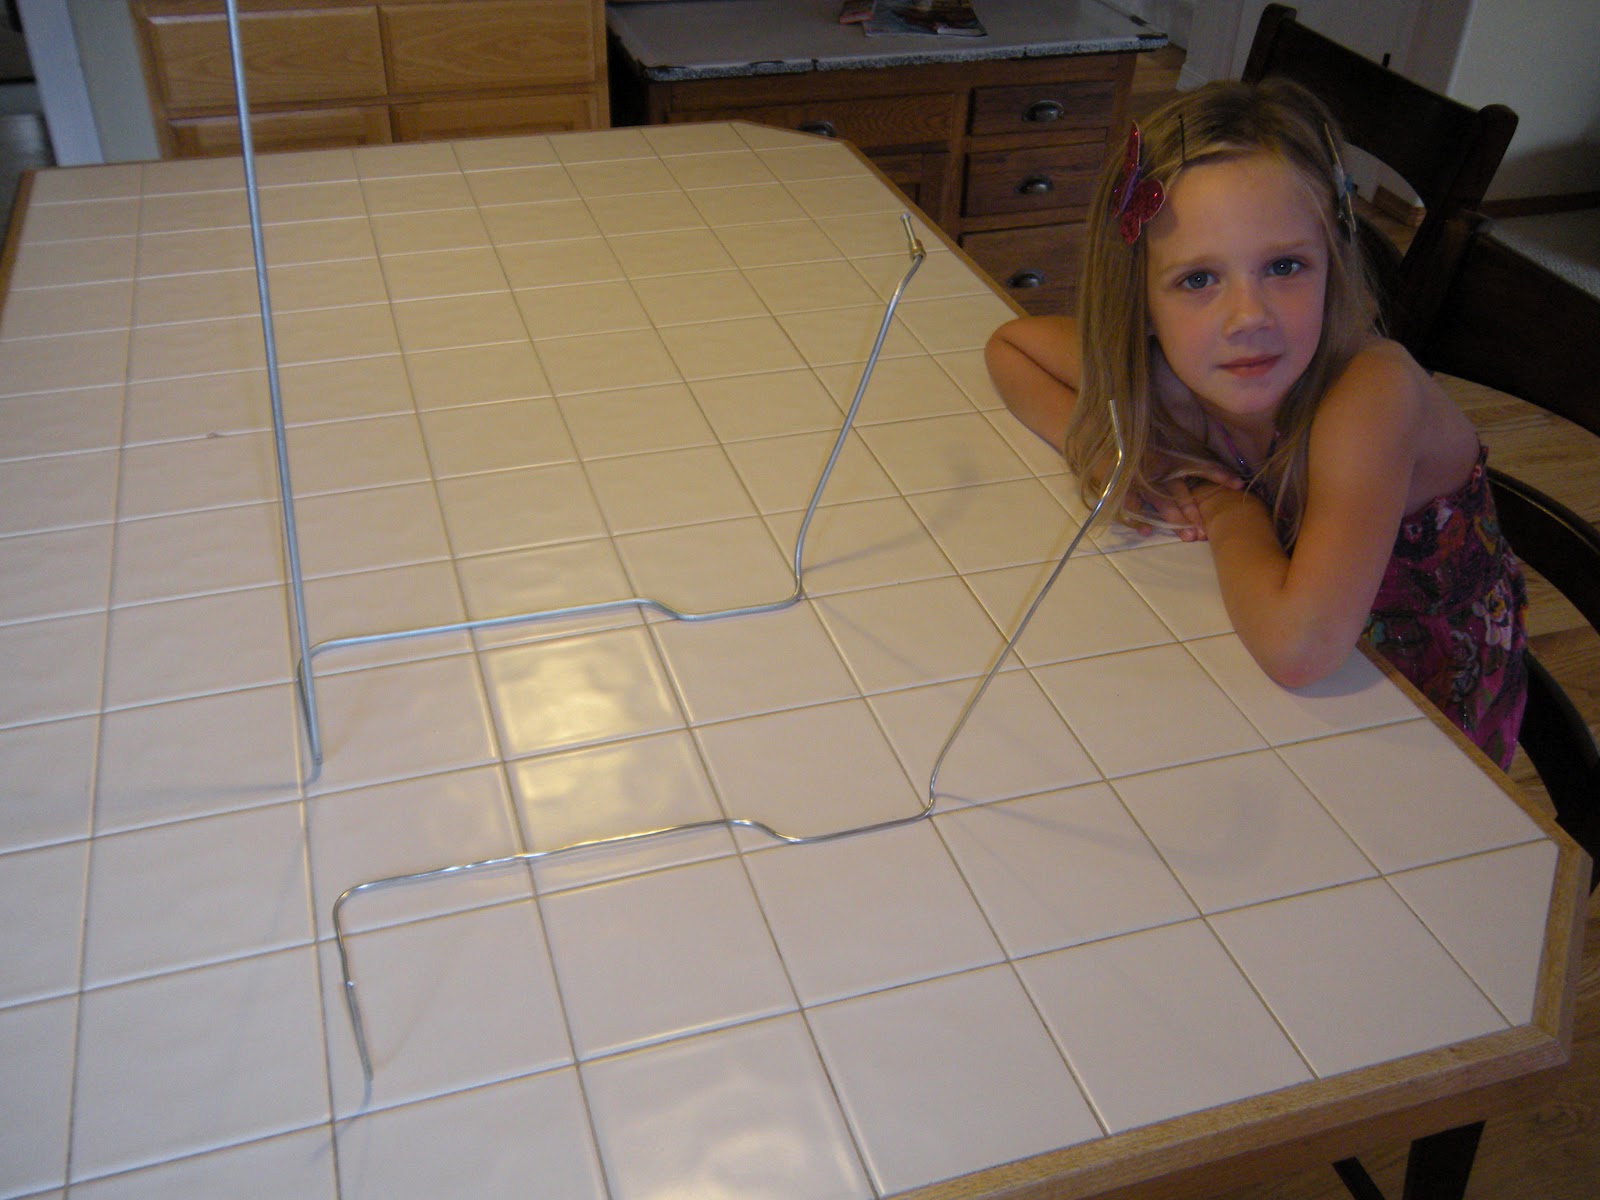
I made a steel hard line for my hydraulic clutch and it turned out terrible.  One little miscalculation on the first bend and that will mess up the rest of the bends.  So what I did was use some 1/8th inch solid core solder I had kicking around and bent up a perfect run.  That was easy due to the solder all  rolled up and compact as opposed to the long steel tube.  Also, it's obviously much easier to bend and get "just right."  Once I had the model done, then all I had to do is make the tube like it.  I went in the kitchen for some comfort from the heat of the garage to do my bends and I found a use for my outdated tile kitchen counter-bar-thing; I used the grid pattern to help get the tube to match the bends and angles of the sample.  After I was done with it, I put it in the engine bay and the tube fit like a factory item.  I'm very happy with that and the brake lines will be much easier due to being so short.
Next I finished the fuel line from the pump in the rear of the car below the tank to up near the fuel rail.  I looked at the different fittings that could be used and decided to go with AN fittings.  They are easy to work with and offer every fitting combo under the sun.  I was going to run the stock Civic fuel filter and cleaned one up from the junk yard but it just took up too much space (I am dealing with a mini after all) and I found an in-line filter that flows up to 130 GPH and is good for 40 microns.  That was a good find and will go anywhere.

I started with a roll of solid core solder to make the template for my steel tube hydraulic clutch line.
Mostly bent up.

Solder bent up and looking good.
Another view.
I took the solder model and made a real part out of the steal tube.

Mia couldn't believe she could bend steel like Superman so I gave her the solder to try.  She is so strong!

Steel tube in place, perfect fit first time.

Another view.

Here is the fuel filter, inline just below where the intake and fuel rail go.


I used hose clamps to secure the fuel line under the car. The other line is part of the hydrolastic system (same tubing).

Fuel pump mounted and plumbed.

One other thing I got in the mail was this fan from Spal.  It's super low profile and will move enough air to cause the jet streams to change course and blow the clouds away from Seattle.  I'll fire it up October through June...


Monday, July 2, 2012

Fuel Pump


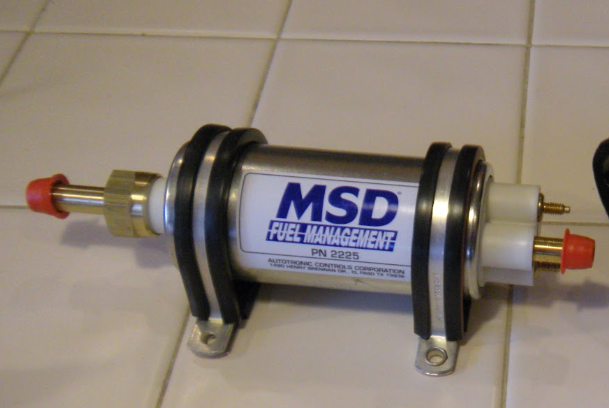
This week I installed a fuel pump from MSD, it took forever to find a good place for it.  I wanted to avoid the exhaust system and I had to work with most of the existing tubing so finding the best place was limited.  I have seen many people mount the pump in the "boot" however I want mine under the car.  The good news is all the fuel lines will be located far away from the exhaust system.  One more thing checked off the list.

I also finished up the hydrolastic suspension lines and started work on the hydraulic clutch hardline.  More pictures next week.

Monday, June 18, 2012

Odds and Ends


Lots of pictures this post!
This week I received the electric exhaust dump I ordered from Quick Time Performance.  It's a valve in your exhaust that can be opened and closed by holding a switch one way or another. You can do a partial open or close if you wish too.  I'm thinking of plumbing the dump output back into the exhaust system after the muffler to help keep the exhaust out of the car. This car is from 1967 and is less than air tight.
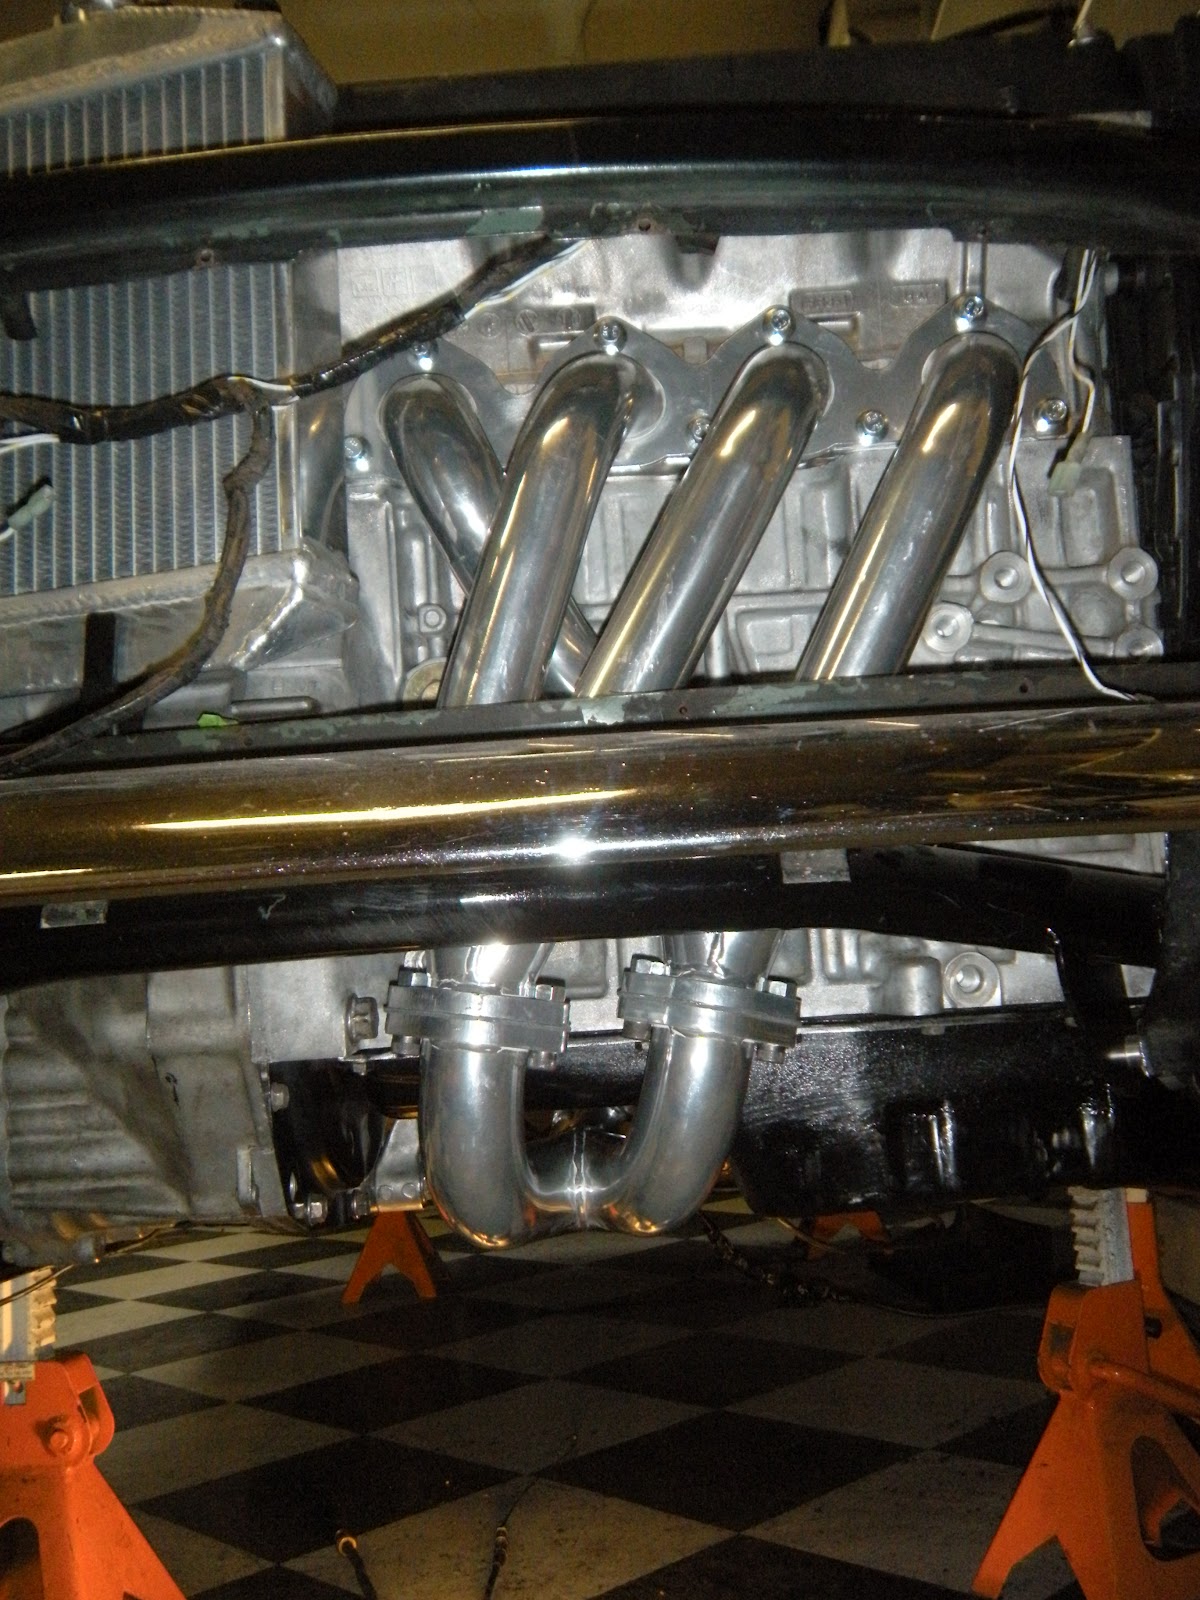
 Also, I installed the rest of the header and I must say it looks cool from under the car, and I put one of the axles in place to make sure it fits.  Lastly, I made some new hydrolastic lines up front with some cleaner angles than stock and then installed two needle valves out back to control how much the suspension moves. 


This is the electric valve I bought for the exhaust.

One axle is in (without boots) and it fits perfect.

Another shot.

  I had the splines cut extra long for more play, turns out I don't need it.
One step closer.

Second half of header is in, I held off to avoid damage until now.
Another shot.

Looking under the car from the front.

Here is one new hydrolastic line with a simple "Z" bend.  The last one looked more like a "ZWSM" bend!

One needle valve per side to control fluid flow.  Some guy who used to race a mini with the "wet" suspension told me about this trick.

Just a Bit of Paint

NEW?  CLICK HERE FOR DAY ONE!

Click here for a 3 minute video of the entire build. 


For this week, the only thing done was a bit of painting.  Too many other things going on and the mini has fallen by the wayside as did my self imposed deadline.

Shift linkage done and painted ready for install.

I painted the axles I got back from Dutchman Motorsports.

This is a fuel filter from a Civic, I'll cut off part of the mounting bracket that won't get used.

Monday, June 11, 2012

Radiator and Wiring Harness


The progress made this week was getting the radiator mounted as well as lots of time cutting, tack welding, then putting final welds on the shift linkage.  It was nice to sit in the car and finally run through the gears (I'm missing a picture of that but will update it later today).
 I also started to track down where all the wires go in the wiring harness.  I cross referenced some schematics I found online with what I have and so far things are looking good.  My daughter Mia was a great helper, I would show her a wire starting at the ECU plug and she would trace it all the way to where ever it ended up.  Then she would check off the wire on the schematic.  This project also doubled as a color blindness test with the wires having green with a yellow stripe and such, she passed.  I could have done it faster on my own but it was great to have her working on my project.  Time well spent!

Marking where to cut.

Rough cut

Some shaping and it's good, (I'll put some rubber hose on the sheet metal as a guard).

Wiring harness, fun stuff.

Mia checking off the wires that we tracked, note the picture of me she drew.

A great helper!

Monday, June 4, 2012

Axles

NEW?  CLICK HERE FOR DAY ONE!

Click here for a 3 minute video of the entire build. 


This week in the garage I messed around with the axles and I was able to finally make a complete set out of all the components I scavenged over the last month.  The last piece I had to find was an inner CV joint that fit my specific half shaft, blah, blah, blah.  Anyway, I now have all the parts to make those round rubber things that roll on the road actually move.

Hub in place without CV installed in it and the Honda axle going through it, yup it's a bit long.

After marking the length, I did a little measuring and some math to find out just how much the Honda shaft needs to cut down.
Here is the Honda shaft mostly stripped and ready to be shipped to Dutchman Axles in Portland, Or. for the cut and new splines.

Tuesday, May 29, 2012

Wiring Harness, Fuel, Oil

NEW?  CLICK HERE FOR DAY ONE!

Click here for a 3 minute video of the entire build. 


Last week I was a plumber, this week I'm an electrician.  I spent 4 hours at the wrecking yard removing and labeling the under dash wiring harness from a 1994 Honda Civic.  What a mess that was, I think they take the wire harness, send it down the line and build the car around it. The cool part is not having to be careful with the dash and other components.  So now the wiring harness is strung out on the garage floor and the real fun starts.  I spent at least two hours cutting away the wires I don't need.
Meanwhile at the other end of the car... I finished the fuel line that goes into the gas tank, I cut the original small tube off the flange, drilled out the hole, bent a larger steal tube, inserted and welded both tubes back on the flange.  I welded the small tube back on right next to the new one because it holds the fuel level sending unit in place.  I then sealed up the tube where it goes through the flange with J.B. Weld to make sure there are no leaks.
Another thing done is the cutting of the shelf behind the dash (hidden area) to provide clearance for the clutch and brake pedal box assembly which I hope to mount in a day or two.
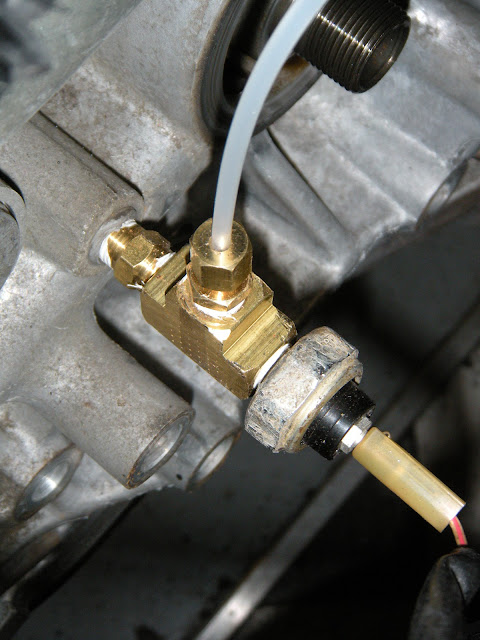
As what is common in old cars, I have a mechanical oil pressure gauge in the dash but the Honda motor has an electric oil pressure sending unit.  I want to keep all my stock classic gauges (which are in excellent shape) so I bought a "T" at the local  Ace Hardware down the street and plumbed that in so now the ECU still receives a signal and I have a  place to plumb in the oil line for the mechanical gauge.  Boom that was easy.
Monday my good friend Dave came over to lend a hand, we were able to do some fine tuning on the position of the engine/frame assembly, thanks for your help Dave!
The weekend flew by and a per the norm I was only able to get half of what I wanted done.  So next is mounting the radiator, pedal box and shift linkage.  Oh, fuel and clutch lines also.  And oh yeah, the rest of the Hydrolastic suspension lines too.  And, and, and...

Wiring harness rat nest.
My pedal box modified and stuffed with Wilwood master cylinders!

Big hole in dash shelf for pedal box.

"T" for oil pressure sending unit and mechanical tap.


Fuel line and sending unit flange (cut).
New 3/8 fuel line welded in with flared end.

Sealed up new fuel line.